Showing posts with label halloween. Show all posts

Wednesday, November 2, 2011

My Mad Halloween Tea Party

I first posted about my Halloween Tea Party here. Cassandra and I have been planning this artful gathering for weeks. It was a party for members of our "Pretty and Vintage Things" meet-up art group. The party day finally arrived and we spent hours setting up. We had so much fun transforming my house into a wonderland. I loved the decorations so much that I didn't want to take them down after the party! I wish I could live in wonderland everyday! We all had a great time eating, drinking, laughing and creating. Each lady made an Alice in Wonderland inspired altered cookbook. We also made some great memories. Thank you ladies for joining me in wonderland!

Cassandra and Karen

candy buffet!

Cassandra's macaroons

Sarah

Jeanne

Thanks for stopping by! Have a great week! xoxo, Molly

Tuesday, September 21, 2010

Pumpkin Cutie

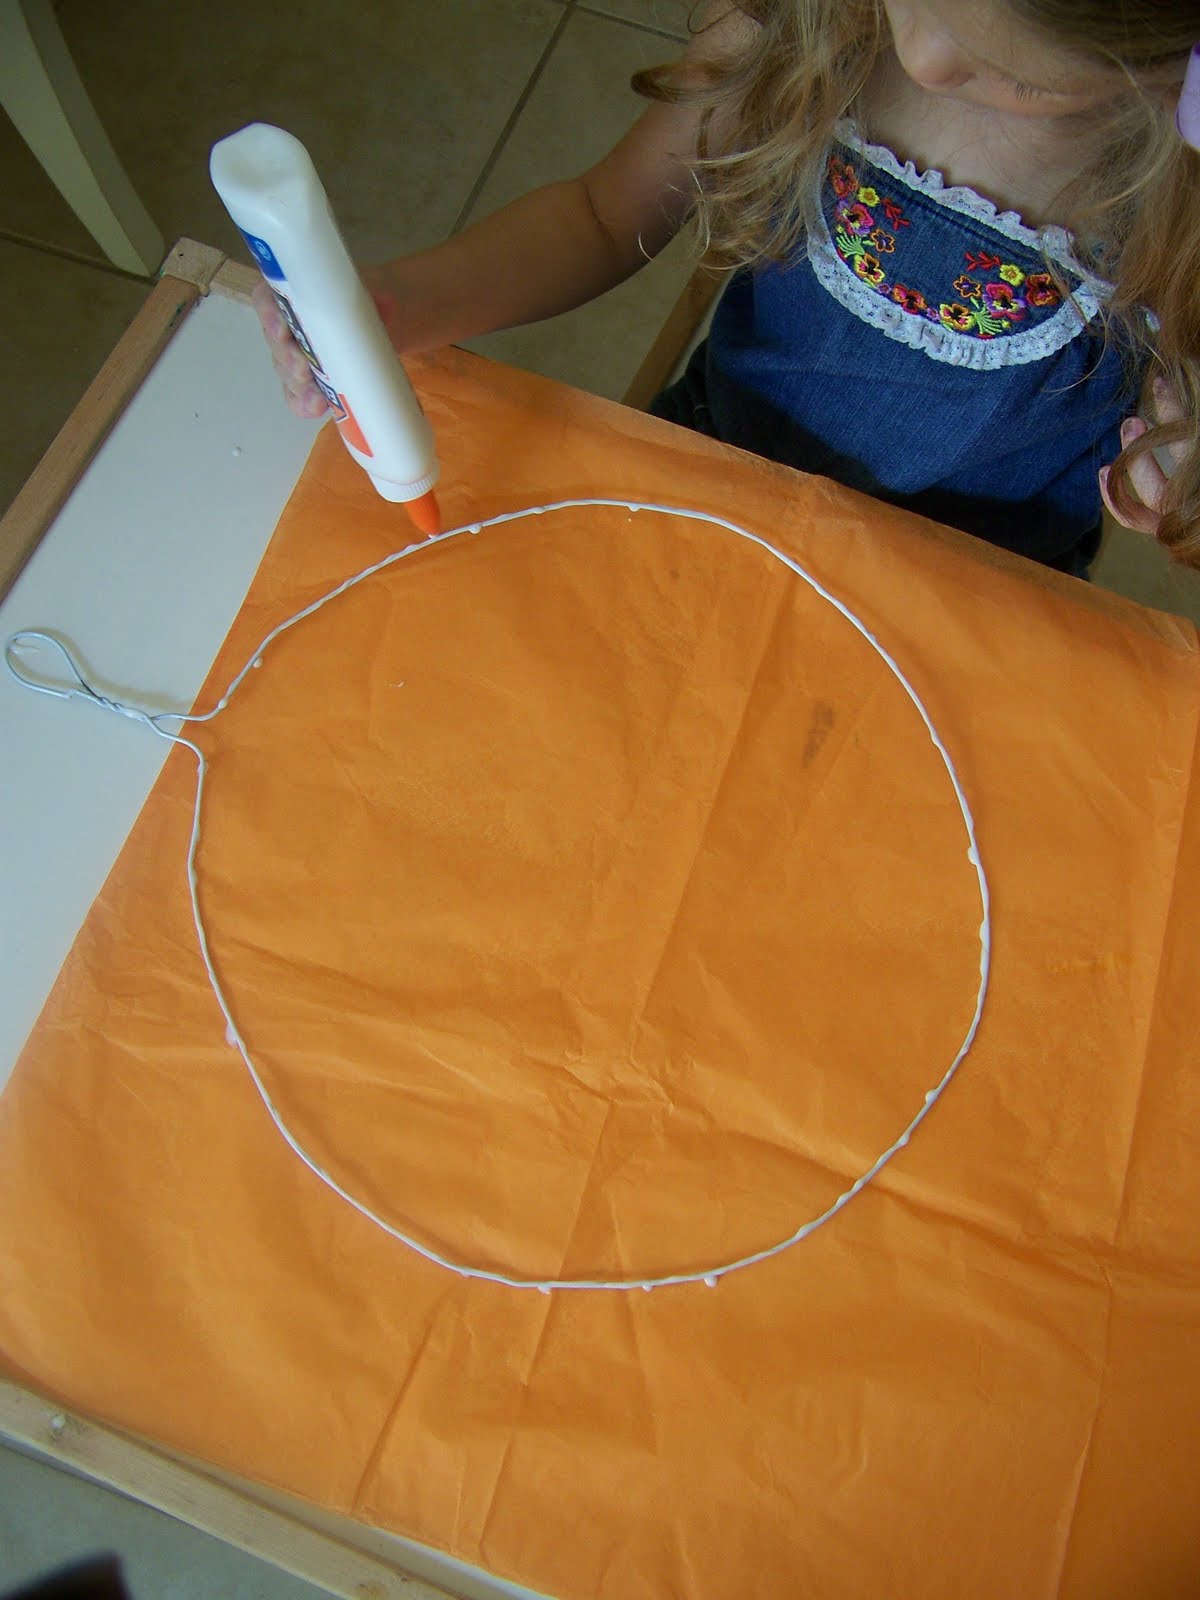
Today my daughter Lilly made this pumpkin cutie to hang in our window for fall. It is a project I made up when I taught Elementary school. I always loved making them. Below I have done a tutorial so that you can make them with your children and/or students. Enjoy! Supplies you will need:
two large sheets of orange tissue paper
a wire coat hanger
white glue
scissors
brown paper bag
construction paper
marker
Step 1:
bend the coat hanger into a circle or oval shape to resemble a pumpkin,
bend the hook at the top closed to use as a hanger
Step 2:
trace the hanger with white glue,
turn the hanger over and lay it on top of the tissue paper (with the hanger sticking out over the top of the tissue)
Step 3:
trace the other side of the hanger with glue,
lay the second sheet of tissue paper on top of the hanger so that the hanger is sandwiched between the two sheets
at this point the hanger is at the top sticking out of the tissue and there is excess tissue at the bottom of the pumpkin (see picture below)
set aside and let it dry
Step 4:
use scissors and trim the left side, right side and top of the pumpkin,
leaving the long tissue at the bottom,
cut the excess tissue into strips (like streamers)
my daughter is 3 so I used a pencil to draw lines for her to cut on
Step 5: cut eyes and a nose out of construction paper, I have also used buttons and foam pieces for this step, use a marker to draw a mouth Step 6: cut the paper bag into skinny strips and glue them on as hair, you could use raffia or yarn for the hair instead if you choose

Lilly finished off her pumpkin with a big blue bow (Lilly always wears a bow) When I had my students do this project we put a construction paper hat on the pumpkin. You could also put a bow tie on your cutie. When you finish it looks great hanging in a window or from the ceiling. Happy Fall. Have fun creating with your kids!

Love, Molly

Sunday, November 1, 2009

Halloween Fun

I hope you all had a night full of Halloween fun and lots of candy! Here is my Lilly as Little Red Ridinghood. I made her red cloak using a pattern from marthastewart.com. The apron she is wearing was my Mom's when she was a little girl. She loved it all and had a blast getting all dressed up.

Tuesday, October 27, 2009

Halloween Scrapbook

I wanted to share the Halloween scrapbook that I put together for Lilly last year. So far I have finished pages of memories from her first and second Halloweens. I will add pictures this year to finishe up the book. I bought the book in the dollar spot at Target, one of my favorite places to find scrapbook treasures. I made some tissue fringe and tied on a gingham bow to embellish the cover. It was such a fun project! If you look closely you will see some frayed ribbon, torn paper and smeared ink. That is because Lilly literally looks through this book atleast twice a week. She was looking at this book at Easter time!

Tuesday, October 20, 2009

A "Sweet" Weekend

Well our friends Amy and Nolan came to visit this weekend and we had a blast. The kids really enjoyed the campfire, fall festival and just playing together (especially outside in the beautiful weather). We all consumed more sugar than I thought was humanly possible. I filled a cone that I made (pictured at left) and some whimsical Halloween take out boxes with treats for my friend and the kids. Below is a picture of Lilly and Nolan enjoying their yummy cupcakes in my kitchen. We took pictures of them in their costumes but I think I will wait until next week to reaveal Lilly's costume. I can hardly wait to post it...I might give in before next week and show you. We'll see :)
I taught today and had open house tonight so I am pretty beat. I will be back tomorrow to post pictures of the fall crafts that the kids did. They are too cute. Have a great Wednesday!

Love, Molly

Sunday, October 11, 2009

Chenille Stem Whimsy

Okay, so I am obsessed with these little Halloween chenille stem creatures. They look so authentically vintage but I made them. A few months back I found the idea at Vintage Image Craft and I couldn't wait to make them. Then I saw them again a couple of weeks ago at MarthaStewart.com. I searched high and low for the orange and black bumpy chenille stems and could not find them locally so I ordered them online at Crafts, etc. I got them only a few days after I ordered them. Crafts, etc. is very prompt. Anyway, I printed out some vintage pumpkin and cat heads and went to town making them. I've made about 20 so far for Halloween gift buckets and for my own Halloween tree and decor. I can't wait to make Christmas, Valentine, and Easter versions. Elves, cupids, Bunnies. How cute will they be? They are super easy to make so you really should try them. Just click on the links above for instructions and printable clip art to use for the faces.

Tuesday, October 6, 2009

Spook and Sparkle Part 2

Happy Tuesday! As promised here is my Halloween decorating Part 2. The pictures below are of my Halloween spooky village. It is made by Lemax (sold at Michaels stores). My husband and I started the village the first year we were married. Then for the next couple of years we added to it. I didn't buy anything else for a while until last year, I bought the moss covered base to display it on (which I think adds so much). I have the village on a sideboard as you enter our house. It is so fun all lit up at night. Lilly just loves it. Some of the pieces even make spooky sounds. I hope you guys are having as much fun as I am putting out your pumpkins! P.S. The guy above, left is a favorite of mine. I bought him years ago at Michaels I think. He reminds me of the vintage Halloween candy containers like this.

Monday, October 5, 2009

Spook and Sparkle Part 1

My halloween tree and other decor went up this weekend. I was only able to take a couple of pictures before my camera battery died. Tomorrow I will get new batteries and show you the rest. I am so happy with my tree (left). I made the topper today and added it to the top. I add something new to it each year. Lilly got so excited when I lit up the orange lights. She even hung some of the ornaments. She did such a good job that I didn't even have to move them :) She said "Mommy, I being careful". She was careful except when she tried to take a bite out of the glass candy corn ornaments. yikes! Can we say safety hazard. She was running around saying "Decorate! Let's Decorate!" She is a mini me for sure. Below is a close up of the tree topper. Hope you enjoy. Come back tomorrow for more spook and sparkle!

LinkWithin

Related Posts Plugin for WordPress, Blogger...