May the God of hope fill you with all joy and peace as you trust in Him, so that you may overflow with hope by the power of the Holy Spirit.
Romans 15:13


I wish you and your family many blessings in 2011
Love, Molly

I wish you and your family many blessings in 2011
Love, Molly
 Supplies you will need:
  Step 1:
  Step 2:
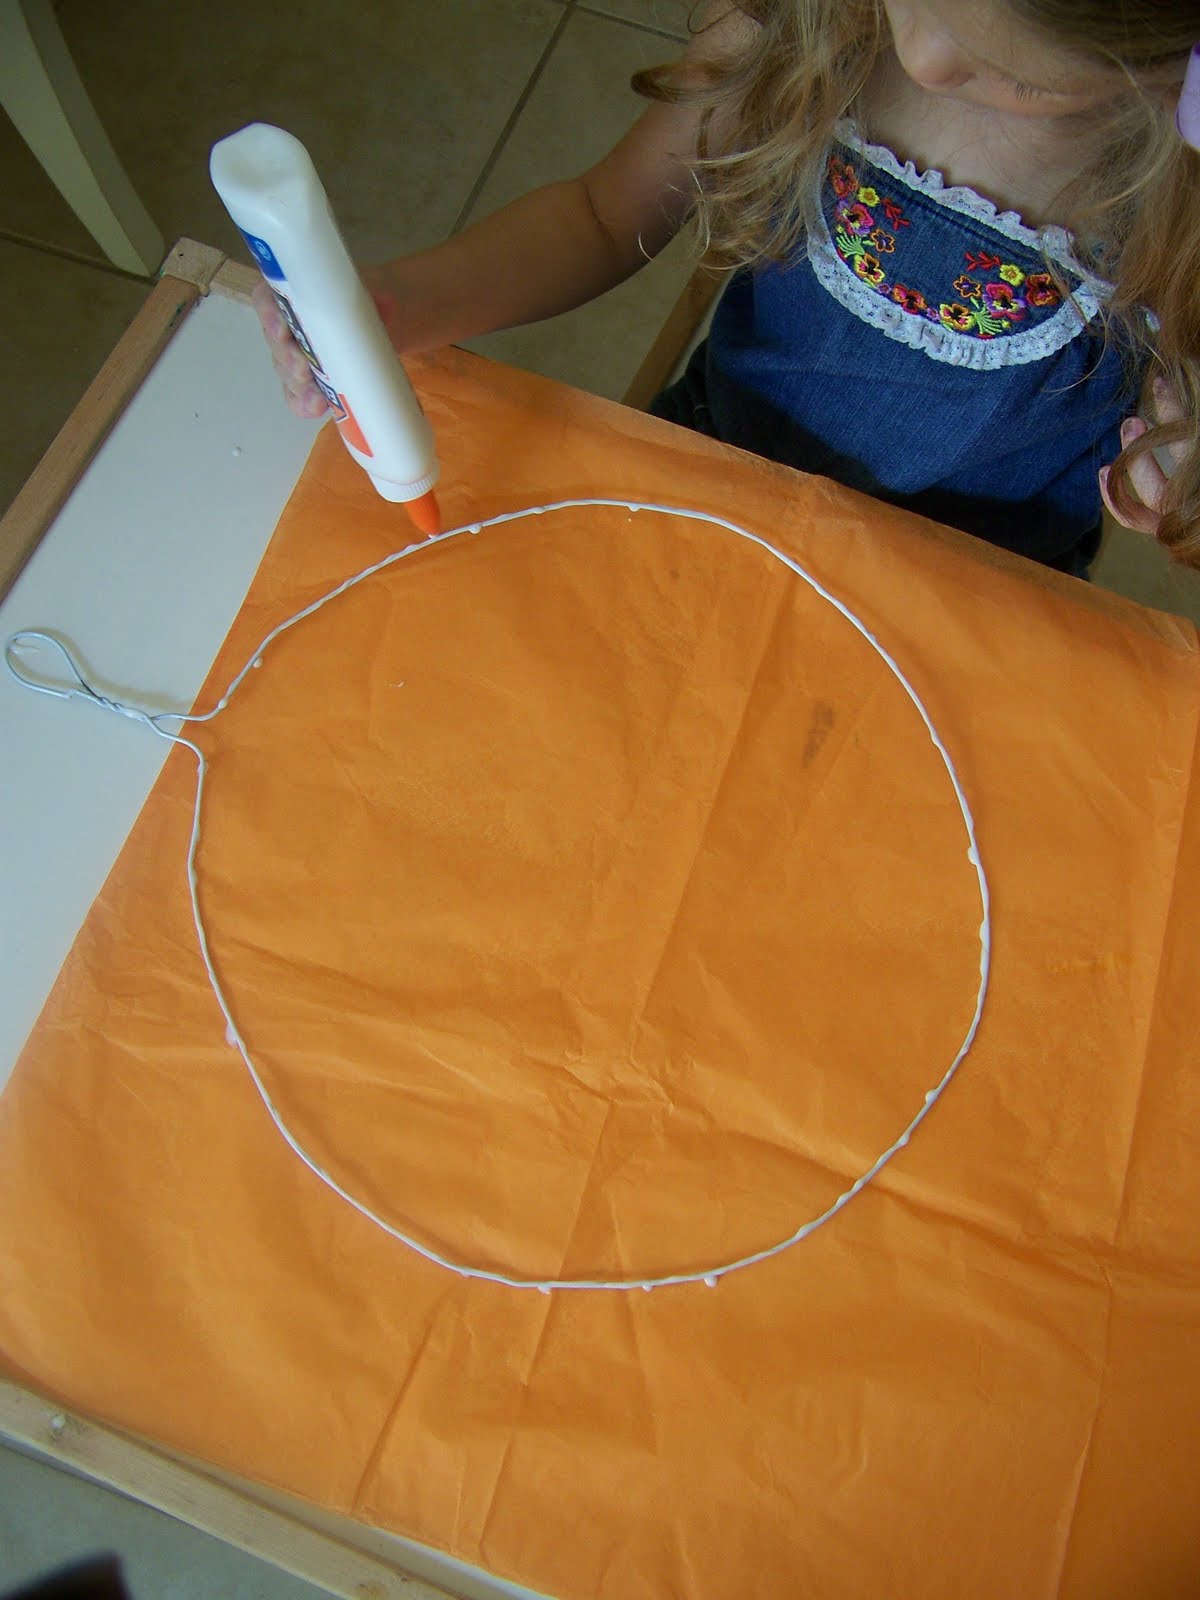 Step 3:
 Step 4:
 Step 5:
cut eyes and a nose out of construction paper,
I have also used buttons and foam pieces for this step,
use a marker to draw a mouth
Step 5:
cut eyes and a nose out of construction paper,
I have also used buttons and foam pieces for this step,
use a marker to draw a mouth
 Step 6:
cut the paper bag into skinny strips and glue them on as hair,
you could use raffia or yarn for the hair instead if you choose
Step 6:
cut the paper bag into skinny strips and glue them on as hair,
you could use raffia or yarn for the hair instead if you choose

Lilly finished off her pumpkin with a big blue bow (Lilly always wears a bow) When I had my students do this project we put a construction paper hat on the pumpkin. You could also put a bow tie on your cutie. When you finish it looks great hanging in a window or from the ceiling. Happy Fall. Have fun creating with your kids!
Love, Molly
 Last July I did a tutorial on the patriotic crepe paper fringe and linked these printable cupcake toppers. You can find it all here.
 Next, we made red and blue kool aid ice cubes...
 Then I made some patriotic tissue paper pom poms because I love pom poms and I have to drape something from this chandelier at every holiday...
 Next, I made the kiddos some festive goodies. I picked up some red and blue tin pails in the dollar spot at Target and filled them with my favorite childhood fireworks: snakes, pop-its, and smoke bombs. I also included packs of skittles that fiz and pop in your mouth! At Walmart I found some cute red and blue melamine plates and used a permanent paint pen to personalize them for the holiday.
 I completed the place setting with a box of Cracker Jacks tied up with sparkly stars and ribbon. I love the Cracker Jack packaging, still the same as it was when I was a kid and so perfect for the 4th!
 A fun time was had by all!

 Happy Birthday U.S.A.! I wish you all a blessed holiday.
 Not so cute.
  Next, cut the heart out with scalloped scissors and use a glue stick to affix it to the box top.
 Now comes the fun part...Ebellish, embellish, embellish. I decided to top mine with a crepe paper flower, pearls and some paper leaves. You could use stickers, craft foam hearts, die cuts, vintage valentines or whatever else you could think of. If you want to top yours with a crepe paper flower like mine, here's how to make it:
 Set the tension on your sewing machine to about 8 (you want it high) and then set your stitches long. This will cause the crepe paper to gather as you stitch. Now you will stitch down the center of the entire length of the streamer. When you begin stitching, back stitch to secure but do not back stitch at the end because you may need to adjust the amount of ruffle you want for your flower.
 After you have finished sewing, fold the streamer in half again along the stitches so it will be a double ruffle.
 Next, glue one end of the ruffle to the box (wherever you want the center of the flower to be). Begin winding the ruffle around the center, using hot glue to secure as you go.
 Finally, add pearls or a button to the center and some leaves and that's it you're are done.
 p.s. I emptied out the chocolates and filled the box with some of Lilly's favorite confections. You could also fill it with little trinkets. Remember to save your boxes you get this year and you can transform them for next year and refill them with goodies for a loved one.
 They are so simple to make and can be used for so many holidays and occasions so I thought I would share a tutorial of how I put them together. Let's get started:
 Step 2:


 I did this until it formed a circle. Then I stapled an "X" in the middle to hold all the gathers together. You might have to add a third staple if your paper isn't staying ruffled.
 I hot glued the medallion onto the front of my cracker then added a circle punched from white cardstock. Finally, I added a glitter heart foam sticker and a little banner with the name of the recipient.
 We had a great day today. Lilly and Doug and I spent the day with my grandparents and my mom and dad. We went to my Dandaddy's (grandfather) church together and then had lunch. After lunch we looked through my Mom's old scrapbooks from jr. high and high school. Mom and Dad grew up together so it was great to see pictures and momentos from their past, times they shared together as kids. That is pretty amazing to me. Another amazing experience from the day was getting to read some of the letters my Dandaddy wrote to his mother from his ship during World War II. They were unbelievable. I couldn't put them down. So much feeling and so much history in those letters. Many of them were written during Christmas time. I can't imagine my grandfather and all those other U.S. soldiers having to spend Christmas on a beach in the South Pacific in the midst of war. We owe so much to veterans.
When I got home I snapped some pictures of my living room and dining room to share with you. I love the "twinkly bright" feeling of the rooms. I use lots of gold, glitter, snow and vintage glass bead garlands.
We had a great day today. Lilly and Doug and I spent the day with my grandparents and my mom and dad. We went to my Dandaddy's (grandfather) church together and then had lunch. After lunch we looked through my Mom's old scrapbooks from jr. high and high school. Mom and Dad grew up together so it was great to see pictures and momentos from their past, times they shared together as kids. That is pretty amazing to me. Another amazing experience from the day was getting to read some of the letters my Dandaddy wrote to his mother from his ship during World War II. They were unbelievable. I couldn't put them down. So much feeling and so much history in those letters. Many of them were written during Christmas time. I can't imagine my grandfather and all those other U.S. soldiers having to spend Christmas on a beach in the South Pacific in the midst of war. We owe so much to veterans.
When I got home I snapped some pictures of my living room and dining room to share with you. I love the "twinkly bright" feeling of the rooms. I use lots of gold, glitter, snow and vintage glass bead garlands.

 Christmas Blessings to all, Molly
  my centerpiece
 a cozy corner

nativity my grandparents gave me for my 2nd Christmas, December 1977


Love to all, Molly
 I don't know about you guys but I am just becoming more and more frustrated and annoyed with retailers skipping Thanksgiving and going right to Christmas beginning in September! Christmas has been slowly but surely creeping farther and farther back. When I was young I remember my Mimi commenting on how terrible she thought it was that stores had Christmas out in early November. Well these days we see Chistmas popping up in stores as early as September and I think it is a crime. They use this tactic to get us to buy, buy, buy. Buy presents, buy decorations, buy clothing!. I'm not falling for it. Yes I have made a few ornaments and have been thinking of some Christmas decorating ideas but I can assure you I will not ignore Thanksgiving and to me the Christmas season does not begin until we have recovered from our turkey hangovers.


