May the God of hope fill you with all joy and peace as you trust in Him, so that you may overflow with hope by the power of the Holy Spirit.
Romans 15:13


I wish you and your family many blessings in 2011
Love, Molly

I wish you and your family many blessings in 2011
Love, Molly


 Even though I am not hosting Thanksgiving at my home this year, I still decorated the table. After all I believe Thanksgiving should be celebrated every day in November, actually everyday of the year I made a Thanksgiving "tree" with willow branches and paper Japanese Lantern branches. I used vintage Thanksgiving images to create ornaments. I glued the images on a brown paper grocery bag and trimmed around the edges with decorative scissors. Then, I backed them with scrapbook paper and added glitter to the images. Finally, I punched a hole in the top and tied them to the branches with vintage seam binding.

 Hope you are having a beautiful fall day! ~Molly
 I L-O-V-E-D it and have wanted to make one of my own ever since. Almost one year later I finally did...
 I am so happy, happy. First, I googled "Pottery Barn Book Page Wreath" so I could see the original picture from the catalogue ( I know I ripped it out for inspiration back in December of '09 but I couldn't find it) Then, I googled tutorials for the wreath. There are quite a few out there. Honestly when I followed a couple of the tutorials my wreath wasn't looking exactly like the one in PB so I merged a few of the techniques together then added some of my own techniques and I think I got pretty darn close to the original. I used 3 different vintage books so I would have different shades of worn book pages and different sizes. All of my books were thrifted. One of the books was over 100 years old, one was 80 and the other was 40. I love making things out of old books. I love how they smell and how they feel. There are so many cool thinks out in blogland to make with old books I've got to get busy.

 I am going on a road trip to visit my best friend from high school this weekend. I am so excited! I wanted to take her a little something so I whipped up this cone and filled it with some of her favorite treats. I could make a hundred of these. They are so fun. You can find my tutorial for crepe paper fringe here. Happy harvest to all. ~Molly
 So I decided to jump on the fabric pumpkin bandwagon. Have you seen how many versions are out there in blogland? I used Danielle Thompson's tutorial, based on one from Martha Stewart Living November 2009 issue. Mine don't hold a candle to Danielle's but they aren't so bad and they were really fun to make. You can even get your kids involved. Lilly stuffed our pumpkins for me. When we were working on them she said "Mommy, when I grow up I want to be a pumpkin stuffer." Never heard that one before :) Hope you all are having a fun fall so far.
 Supplies you will need:
  Step 1:
  Step 2:
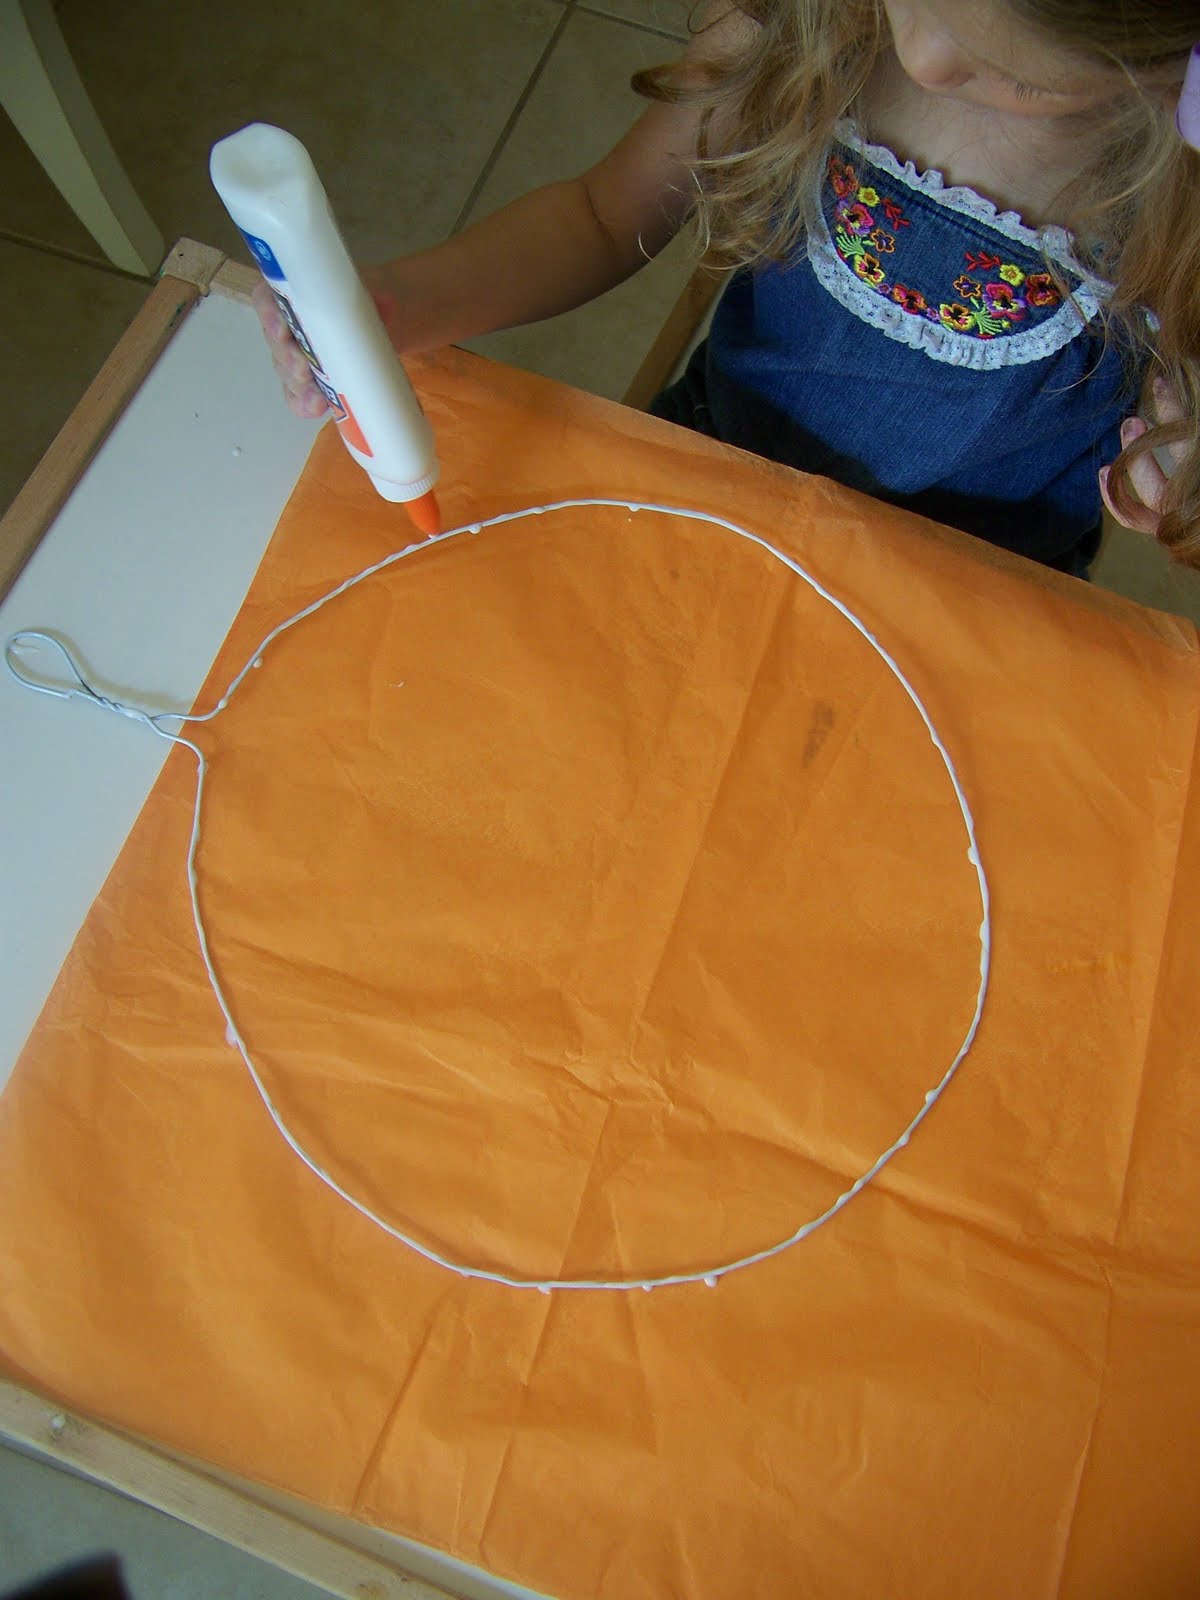 Step 3:
 Step 4:
 Step 5:
cut eyes and a nose out of construction paper,
I have also used buttons and foam pieces for this step,
use a marker to draw a mouth
Step 5:
cut eyes and a nose out of construction paper,
I have also used buttons and foam pieces for this step,
use a marker to draw a mouth
 Step 6:
cut the paper bag into skinny strips and glue them on as hair,
you could use raffia or yarn for the hair instead if you choose
Step 6:
cut the paper bag into skinny strips and glue them on as hair,
you could use raffia or yarn for the hair instead if you choose

Lilly finished off her pumpkin with a big blue bow (Lilly always wears a bow) When I had my students do this project we put a construction paper hat on the pumpkin. You could also put a bow tie on your cutie. When you finish it looks great hanging in a window or from the ceiling. Happy Fall. Have fun creating with your kids!
Love, Molly
 Here's how we made 'em:
First, I cut apart a cereal box and flattened it out. Then, I used a sharpie to draw tree tops and cut them out for the girls (of course older children could cut their own)
Here's how we made 'em:
First, I cut apart a cereal box and flattened it out. Then, I used a sharpie to draw tree tops and cut them out for the girls (of course older children could cut their own) The girls painted the tree tops green.
 Next, I cut 2 inch slits at the tops and bottoms of the paper towel roll on both sides of the roll.
 Then they painted the "trunks" brown.
 I set the tree top and trunk aside to dry.
 Next, I cut small squares of tissue paper and the girls bunched the up into little "apples". After the tree tops are dry, glue on the "apples".
 Finally, I cut a 4"x2" rectangle out of the cereal box scraps to use at the base of the trunk for stability.
 Slide the tree tops into the slits at the top of the "trunk" and slide the rectangle into the bottom slits. That's it! I think they are so colorful and fun!

 Lilly turned 3 years old 8 months ago and I have been dying to make her a scrapbook to commemorate her celebration at Disney World. Last weekend I finally finished it. It was so much fun to make. I have been collecting fun Disney papers and embellishments for months now. I ended up doing my journaling in the form of a story about "Princess Lilly's Birthday". That was kind of Lilly's idea. She wanted the book to be a story. I thought that was great and I went with it. I have to add that the best part of making this scrapbook was that Lilly participated too. During one of my scrapbooking sessions I gave her some scraps of paper, stickers, crayons, and a glue stick. She sat across from me and worked for an hour! I was so impressed. She said "Mommy will you put my page in the scrapbook?" Of course I will! The next day she asked me to put it on my blog. Can you believe 3 year olds these days know about blogs :)


And last but not least Lilly's first scrapbook page...

 Last Thursday I was rummaging through my drawer of clothes that I have collected and saved for sewing projects. I found this girls shirt at a thrift store a while ago and I bought it because I loved the fabric. The shirt was way too big for Lilly and way too small for me but I knew I could use it for a project one day.
 Later on that same day Lilly and I headed for one of our twice a week trips to Super Target. I was browsing the sale racks and found this baby...
 It was the exact same color as the background of the thrift shirt and it was 4 Bucks! It was so meant to be. I snatched it up and could not wait to get home and figure out what I was going to do. I had seen an awesome embellished hoodie here not to long ago made by Alisa Burke. She was inspired by some cardigans from Anthropologie. So I decided to cut out the front of the thrifted shirt and applique it to the hoodie.
 And speaking of meant to be...look at this dress on Lilly...
 I found it at a thrift store last week, it is a Lilly Pulitzer, excellent condition, it is her size and it was 99cents! Loving it!